Showing posts with label DIY. Show all posts

Sunday, July 17, 2011

Throw Pillows GALORE!

Well, I had some extra fabric left over from my tote, so I decided to make a pillow. As previously mentioned, I am no sewer. In fact, I'm a terrible seamstress. So don't judge me, okay?!!
I really didn't know what I was doing so I was looking around for some ideas and I kept staring at this envelope on my desk. Light bulb! I decided to sew it like an envelope... so that's what you need to keep thinking as you read this... envelope, envelope, envelope. (Envelope is a weird word...)

Here's what I did:

Step #1- take your pillow form and wrap your fabric around the entire thing, with a fold going about half way down the width. Make sure you have enough room on the sides to sew down and fit your pillow.


Step #2 - Fold your fabric inside out and sew about 1 inch in on the open ends... leave your fold alone for now.


Step #3- You can either leave your fold as is, or cut it to however you like. I decided to cut angles into mine... when you're finished sew the edges down, again, about 1 inch.


Step #4- you can sew a button onto it to hold the flap down if you want. I didn't have any buttons on hand so I just tuck it in. Stuff it with your pillow and voila! You're done! =)


I decided to sew a couple of tulle and chiffon flowers on the front for some flair. You can check out the tutorial on how to make them here .


 Pretty great, wouldn't you say?

Here is what the bed is looking like... I'm almost done decorating. I'll probably have to change it soon though... I think it's a little too girly for the hubs. Maybe I'll attempt to make a new duvet? We'll see.


Hope everyone is having a fantastic July! Be sure to send in any fun crafty crap you've done and GET FEATURED on Get Craftlicious!


Wednesday, July 6, 2011

Reversible Tote Tutorial

Alright, so if you know anything about me, you know that I love COMFORT! Lately, I've been dragging around my extremely heavy (albeit gorgeous) leather bag. I have to have a big bag to carry all my crap. My husband seriously calls it my "luggage". Anyway, I discovered Flipped Bird bags. They're super comfy totes and they're freaking cute. There is an etsy site if you wish to view. Here is an example of one of the bags:

Cute, huh?!!! What's awesome about them is they're also reversible! It's like 2 bags in one! My only problem is I'M CHEAP! These suckers cost $48+shipping. No way, Jose. So as I was browsing around Jo-Ann's fabrics, I saw that their outdoor canvas fabric was 60% off! Holy freak! I grabbed 4 yards and went to work! Here's the tutorial on how to make your own reversible tote!

Disclaimer: If you are a sewing genius, and like doing things in a precise manner, I suggest you don't read this haha! I made it up as I went along, so you may be offended by my unorthodox methods. =) Also, I apologize for the pictures not being top notch. Hopefully the next iPhone will have a better camera on it... or maybe I'll get a real camera.

#1- Grab 2 of your favorite fabrics. Make sure they're sturdy enough to hold all your crap. I chose outdoor canvas... to soften it up I suggest washing it with some fabric softener AFTER you've finished making it. Decide how big you want yours. The size of the fabric I cut was a 17 in. x 12 in. rectangle. You'll cut 2 rectangles from both fabrics (totaling 4 rectangles, duh!).

 Yes, I'm ghetto and used a piece of cardboard as my "stencil". Yes, that is a hole in my leggings.

#2- place the two rectangles of the same fabric with the outside facing each other. Sew along 3 ends, about an inch from the edge... I decided to curve the corners slightly when sewing.


#3- Pull one bag (the outside one) inside out and pin the edges about an inch inside of the bag. Leave your inside bag outside in, and pin the edges about an inch outside of the bag. (So pretty much the opposite of each other... sorry if this is confusing!)


#4- Place your inside bag into your outside bag.


On to the Strap!

#5- Measure out a comfortable length for your strap. I'm super tall so mine is about 34 inches long. Cut each fabric the length you want and about 4.5 - 5 inches wide. Place both fabrics with the outsides facing each other, and sew along the lengths about an inch from the edges. Then pull the inside out.


#6- After you've pulled the inside out, sew along the length of the edges again to flatten your strap.


#7- Place your strap in between the two bags and sew around the top. You will be sewing over your pins so go a little bit slowly so you don't break anything =)


#8- Pull your pins out and TA DAAAH!!! You've got yourself and amazing reversible tote! Boo-yah!


I decided to stitch a little square of burlap on the outside for some character. Please don't pay attention to the messy bathroom, dirty closet mirror, or silly Nigel dog. =)


Holy crap, I love my tote. It's sooo comfy and it holds a ton!

Supplies:
  • 2 yards of two seperate fabrics (I suggest using outdoor canvas) totaling 4 yards
  • lots of cotton thread
  • additional fabric or beads to spice it up
I got my fabric at Jo-Ann's for 60% off so that cost about $20 plus a big spool of cotton thread was about $3.

Total Cost: $23


Hope everyone had a great 4th of July!
It's been so hot here in AZ I've been finding myself indoors a lot with not a lot of stuff to do. What do you do to stay entertained and cool in the summertime?

P.S. Start your entries for the Get Craftlicious giveaway! You know you need that pennant sign somewhere in your house...

Wednesday, June 22, 2011

The $6 Pillow

Yep that's right... this pillow only cost me $6 to make, and it's the bomb dot com. Only problem is I was doing it in a rush because I wanted to clean up and finish laundry before the husband got home from work, so I totally didn't take tutorial pics! I know, I'm an idiot. HOWEVER, I will write out the steps for you. It's super easy to make, so I'm sure you'll get it in a jiff.


Supplies needed:
  • throw pillow without the case
  • 2 square dinner napkins of your choice
  • needle and thread or sewing machine
  • assorted ribbon
First! Take your two dinner napkins and place the sides you want facing each other.
Next! Sew along 3 sides of the napkins leaving the fourth one open.
Then! Flip it inside out and put your pillow inside
Now! Cut holes large enough for your ribbon down the fourth side.
Last! Pull your cute ribbon through the holes and tie in knots. Voila! You have a freaking cute pillow!


How much did it cost?:
  • 2 dinner napkins from Stein Mart - $2.00 each
  • assorted ribbon from scrapbook store - $2.00
  • needle and thread - free since I already had it
TOTAL COST: $6.00..... Boo yah!

Sunday, May 29, 2011

Mini Project #2- more frames

Yep, I have more frames... I told you it was a humongous bag! P.S. Do you love Get Craftlicious' new look?! I sure do, It's much more clean AND some of my fav colors! A big thank you goes to Andrea Wanlass from Anlyn Photography for her help with Photoshop and taking a few of the photos in this post.

Here are some before shots:


So this bottom picture isn't the exact collage frame I had... but it's pretty close. I am not a fan of collage frames, so I needed to spice it up.

Items needed : Old frames that you hate (or something from Goodwill)
                        Spray Paint
                        Sandpaper
                        Scrapbook paper


I'm normally a Krylon girl, but Home Depot didn't have the color I was looking for. I opted for Rust-oleum. It's a pretty great alternative. =)


After!! :


Spray painted both, the white one with Krylon in Satin white the blue is Rust-oleum in Aqua.


I didn't have an 8x10" picture to put in here, and then it hit me... throw in some scrapbook paper! I love the way they both turned out.

Now for my favorite... This frame turned out better than I could have hoped. Photo credit : Anlyn Photography.


Not cute... at all. When I was first married, I loved it because it's the Tuscan style that I thought was amazing. Well, it's not. So, I grabbed some spray paint again... I'm totally in love with this aqua blue color right now.


Such a pretty color... especially for summer. After it was spray painted, I was just going to leave it for a glossy finish, but my antique-y side got the best of me. I grabbed a piece of sandpaper and went to town!


Didn't they turn out great?!! Again, a big thank you to Andrea Wanlass with Anlyn Photography. She's an amazing photographer and friend. Be sure to check out and follow her blog www.anlynphotography.blogspot.com

Go Get Craftlicious!!

Thursday, May 26, 2011

Mini Project #1 - Frame Re-do

Well, today I re-did a frame, because I'm waiting for the dresser to be moved into the garage area. Therefore, I declare that in between big projects, there will be several mini projects for your viewing. You're welcome.

Here she is:


So I have an entire LARGE gift bag filled with hideous frames from my wedding. If those who gave the gift provided a gift receipt, they would have been returned the next day. This bag has been sitting for almost a year, and instead of heinously re-gifting them, they will be my mini-projects! This one used to say something like "life is not measured in breaths we take but by moments"... pretty cheesy, and I don't really like very many things with quotes on them. So I grabbed my can of Krylon in Satin white, and spray painted her! Flowers were leftover from my T-Shirt project, and hot glued on (Flower Tutorial in previous post). Took me about 10 minutes, including drying time. (Note: it only dried that fast because the high today is about 96 degrees and I put it out in the sun. Man, I love AZ!)

Cost was free because I had everything on hand. If I had to guess, a can of spray paint is about $5, bag of glue sticks are like $1, and a square of felt is like, 40 cents at Michael's. Flower petals made from an old t-shirt.

P.S. Don't you love my potpourri bowl? Found it in the bathroom decor section of Target for $10, and it came with a lager one as well. Home decor isn't always in that one special little section. You can find amazing things in the kitchen, bathroom, and garden departments!

GET CRAFTLICIOUS!

Tuesday, May 24, 2011

J.Crew/ DownEast Basics inspired flower tee...

Before we Get Craftlicious, I wanted to give you an update about Chloe: Unfortunately, on Friday my puppy girl was getting continually worse with her Parvo. We consulted with a Vet, and he informed us that in her state, with such a low immune system, her chances for survival were slim to none. We could tell she was in loads of pain. After a lot of prayer and consideration for my sweet little dog, we made the difficult decision to put her down. It would have been inhumane to make her suffer through the final days of Parvo, and I couldn't bear to see her go through that. We said goodbye to her on Friday night, but feel comforted in the fact that she is in a better place now.
I have been so sad the entire weekend, but today I woke up and decided that the only way I can get past it is to do something I love. I quickly skimmed my list of upcoming projects, and this one was the cheapest, and I had everything on hand! I hope you enjoy!

.....................................................................................................................................................................

If you're anything like me, you probably spend a portion of your week shopping online at places like J.Crew and Anthropologie. You'll also notice that they charge about $40 (give or take a few) for a plain cotton t-shirt with few embellishments.
Well my friends, I made one. I know, I know, Get Craftlicious is supposed to be about home decor. But seriously, I just want my Target tee's to look a little cuter so that I don't feel like poop. =) Only thing is, I'm a terrible sewer... I don't even own a sewing a machine. So what's a girl to do? I know! Make one Breann style, and hot glue it!!!

What you'll need :
A cotton t-shirt - that you'll want to wear
A cotton t-shirt - that you don't mind cutting up for your flowers
Felt - the same color as your flowers
Fabric scissors - or just scissors that are sharp enough to cut through a t-shirt
Hot glue gun

To start, cut a piece of felt into a circle

As you can see, mine was egg shaped and that flower was just okay... best results will come from making it as circular as possible.

Next, you're going to use your felt as a stencil and cut circles out of your t-shirt for the flowers. I found that it takes about 7 or 8 pieces to make the flower look right.


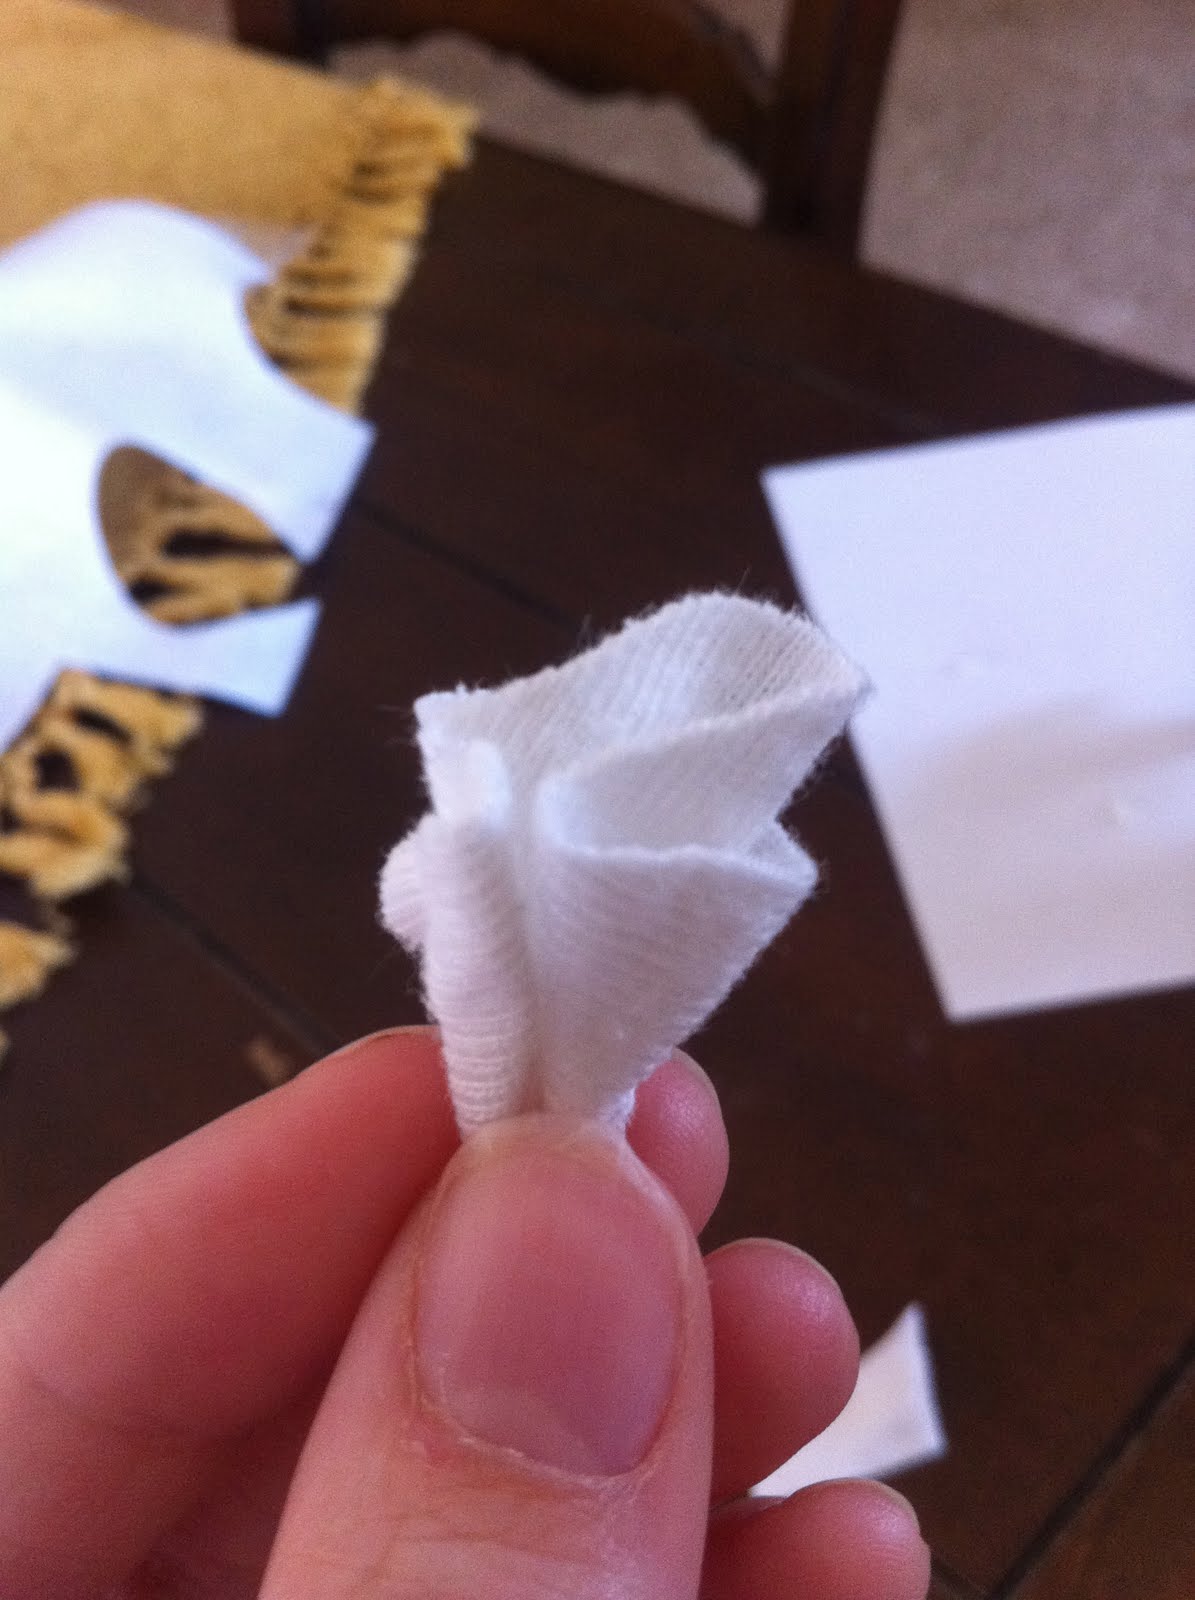
Now take your glue gun, and place a dollop right in the middle of one circle of fabric. To make into a petal, I found it was easiest to pinch the fabric underneath the hot glue. This will allow the edges to fold up and create your petal.


Next, you'll put some glue starting from the center of the felt circle to one of the edges. Then, put the petal on the glue laying on its side, like so:


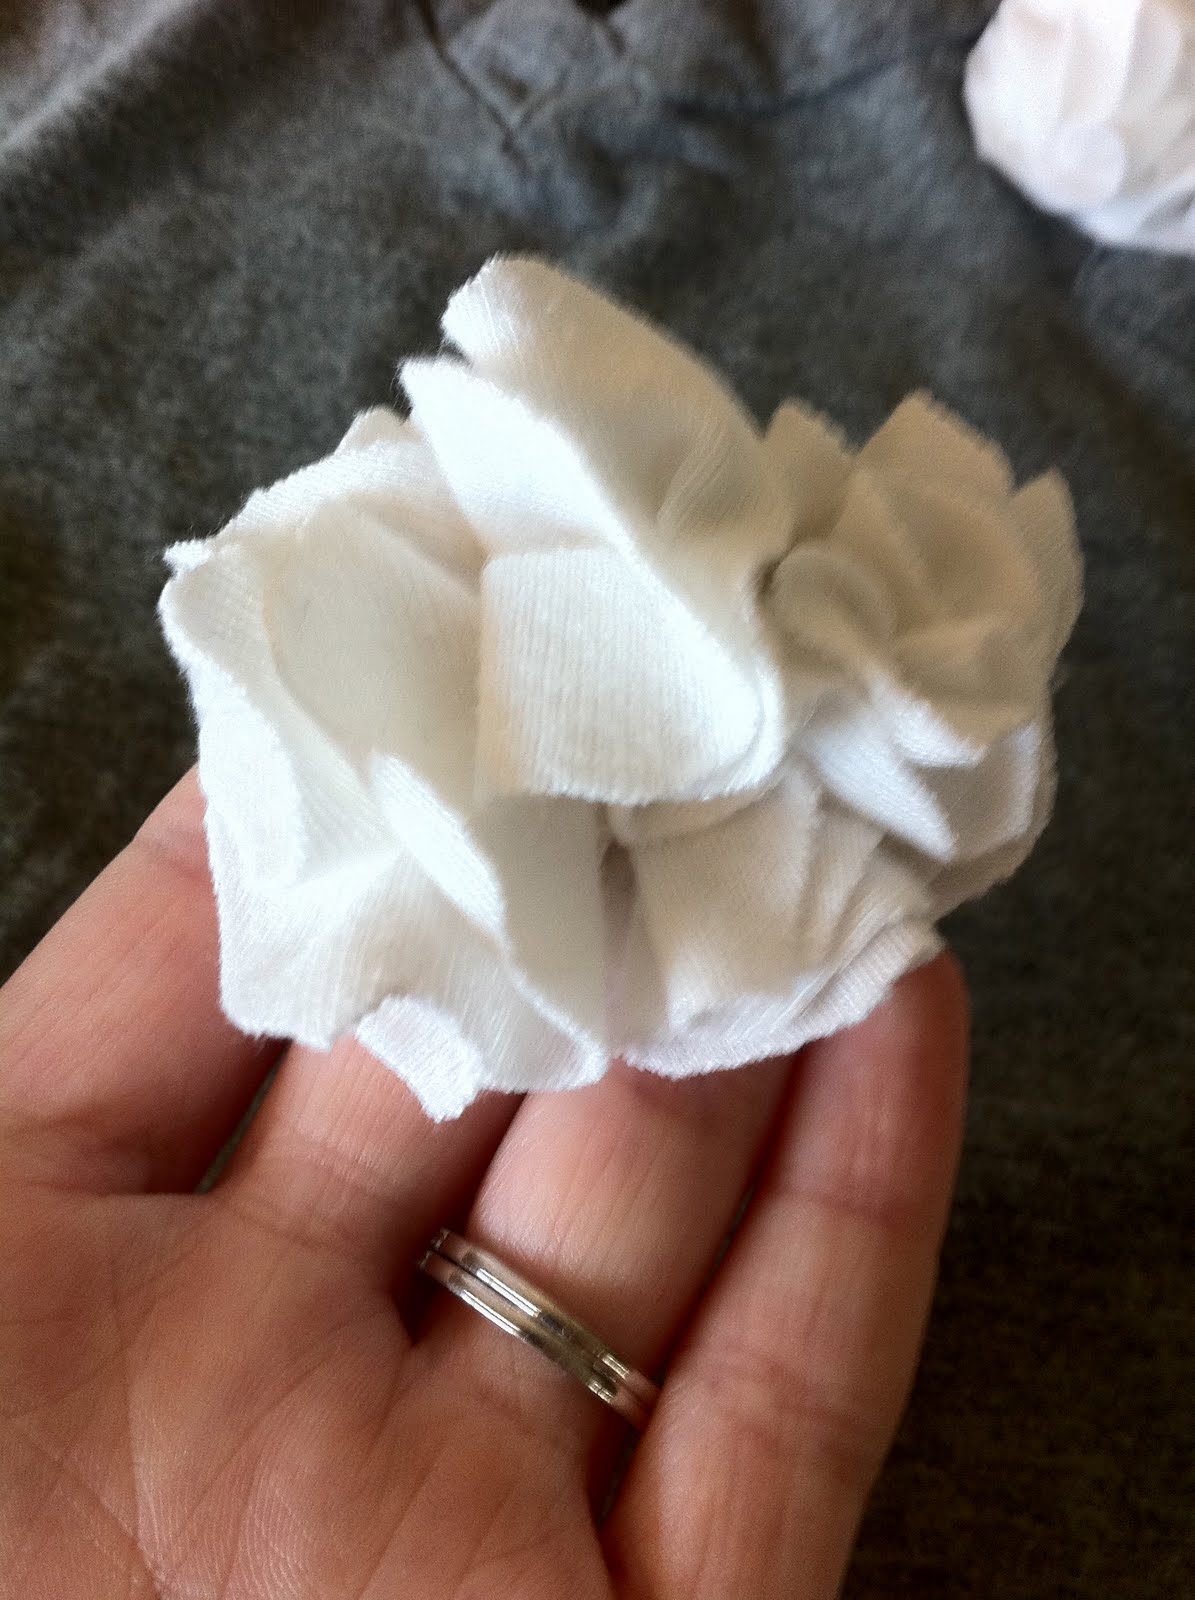
After you've finished gluing them around the bottom, put a big glob of hot glue in the center and place a couple more petals into it, with the bottom point straight into the glue. Aaanndd. you're flower is complete!


You can arrange them however you like onto your T-shirt, mine looks like this... dun duh duh DUN!!


SO CUTE, HUH?!!! I'm in love... it might just be my new favorite t-shirt. Oh, remember, how I told you about a dresser re-vamp? Here are some "before" shots of it taking up space in my brother's disgusting room:


You need to get excited, because I can't wait to Get Craftlicious on this sucker!

Hope everyone has a wonderful week, it's summer wahoo!!! Remember, I'm waiting for your ideas, so send them in ASAP and get featured!

Tuesday, May 10, 2011

sCRAPping

Well, I'm basically a poop because I haven't done anything craftlicious in like, 2 weeks! So sad... my only excuse is my dog had 6 puppies and they are a HANDFUL! Between cleaning up their poo, setting up a dog run in the backyard, and trying to get them sold there hasn't been much time for crafting. Anyway, I finally had a day off and decided to scrap together some stuff and make a pennant sign. My mirror and table re-do needed some color and a new friend.

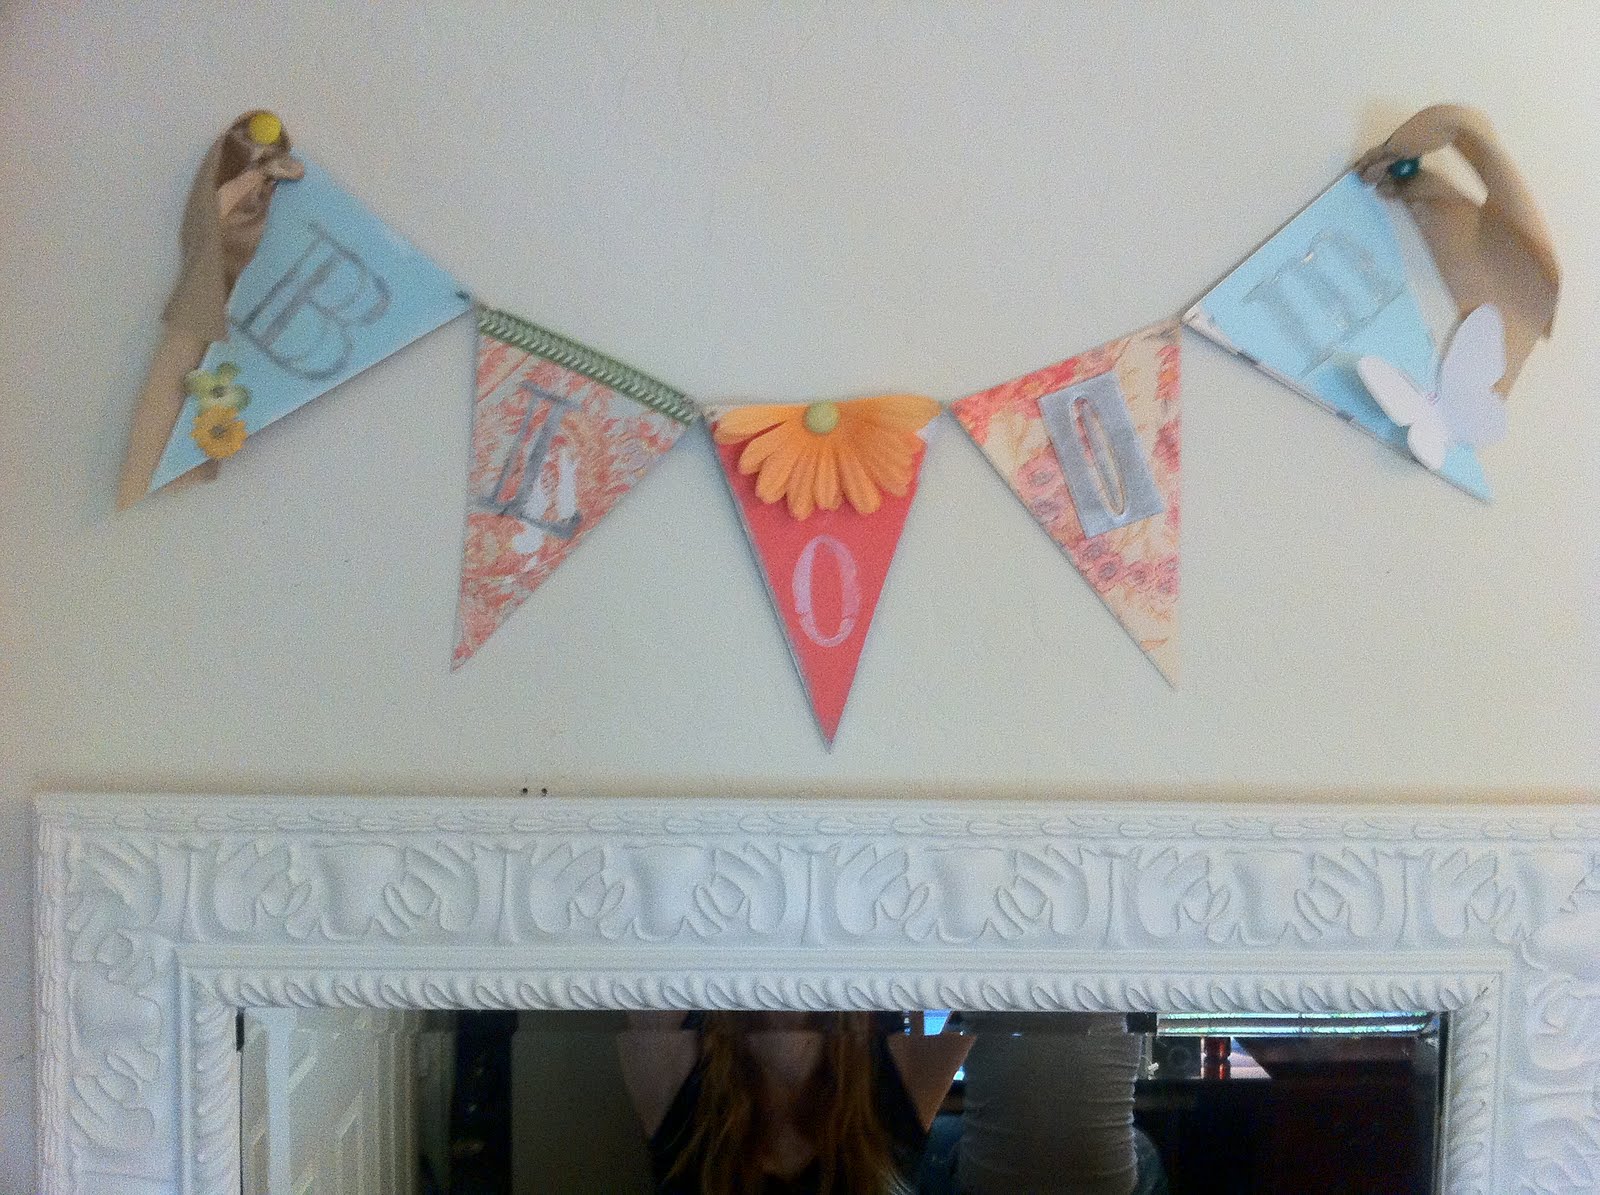
To start, I picked out some super cute scrapbook paper and cut it into triangles for each pennant. I decided I wanted my sign to say BLOOM, so I needed 5 pennants. I recommend gluing your cute paper to some heavy card stock so that it doesn't fly everywhere when you turn on a fan.


Keep in mind not to use too much patterned paper. You're going to add lots of fun knick-knacks, and if every piece is patterned it's going to look too busy.

Next, decide where you want each letter to go. 

I love using different fonts and ways of displaying letters... not everything has to match!

After all your letters are in place, you can add your fun little knick-knacks to really play it up. This is pretty much where the fun begins.

Most of my letters are from a stamp kit I stole from my mom. You can most likely find some at a scrapbook store, or print them from different fonts on your word processor.


Most scrapbook stores sell flower petals like this, or you could tear some apart from a silk flower.

This 3-D butterfly was super easy! I just found a silhouette on Google Images, traced it on some white card stock, cut it out, lightly folded it and glued it along the seam. So cute, huh?!


On a couple of them, i took my stamp pad and lightly brushed it along the edges... it gives it a really cool antique-y look!
To attach them at the edges, I used tiny safety pins... you can use ribbon or other items if you like, though.

Aaannnd, here she is!


Aaah, looks SO much better. Isn't it amazing what a little color can do?

Here is another one I've done before of my last name :


These signs are so fun and cute and they really brighten up spaces. It's nice to have a little extra something... kind of like a push-up bra, it just makes you feel better. ;)

I hope everyone had a wonderful Mother's Day, and there will more fun things to come! Maybe even a giveaway (hint, hint!)

Now get off your bum and go GET CRAFTLICIOUS!