Sunday, May 29, 2011

Mini Project #2- more frames

Yep, I have more frames... I told you it was a humongous bag! P.S. Do you love Get Craftlicious' new look?! I sure do, It's much more clean AND some of my fav colors! A big thank you goes to Andrea Wanlass from Anlyn Photography for her help with Photoshop and taking a few of the photos in this post.

Here are some before shots:


So this bottom picture isn't the exact collage frame I had... but it's pretty close. I am not a fan of collage frames, so I needed to spice it up.

Items needed : Old frames that you hate (or something from Goodwill)
                        Spray Paint
                        Sandpaper
                        Scrapbook paper


I'm normally a Krylon girl, but Home Depot didn't have the color I was looking for. I opted for Rust-oleum. It's a pretty great alternative. =)


After!! :


Spray painted both, the white one with Krylon in Satin white the blue is Rust-oleum in Aqua.


I didn't have an 8x10" picture to put in here, and then it hit me... throw in some scrapbook paper! I love the way they both turned out.

Now for my favorite... This frame turned out better than I could have hoped. Photo credit : Anlyn Photography.


Not cute... at all. When I was first married, I loved it because it's the Tuscan style that I thought was amazing. Well, it's not. So, I grabbed some spray paint again... I'm totally in love with this aqua blue color right now.


Such a pretty color... especially for summer. After it was spray painted, I was just going to leave it for a glossy finish, but my antique-y side got the best of me. I grabbed a piece of sandpaper and went to town!


Didn't they turn out great?!! Again, a big thank you to Andrea Wanlass with Anlyn Photography. She's an amazing photographer and friend. Be sure to check out and follow her blog www.anlynphotography.blogspot.com

Go Get Craftlicious!!

Thursday, May 26, 2011

Mini Project #1 - Frame Re-do

Well, today I re-did a frame, because I'm waiting for the dresser to be moved into the garage area. Therefore, I declare that in between big projects, there will be several mini projects for your viewing. You're welcome.

Here she is:


So I have an entire LARGE gift bag filled with hideous frames from my wedding. If those who gave the gift provided a gift receipt, they would have been returned the next day. This bag has been sitting for almost a year, and instead of heinously re-gifting them, they will be my mini-projects! This one used to say something like "life is not measured in breaths we take but by moments"... pretty cheesy, and I don't really like very many things with quotes on them. So I grabbed my can of Krylon in Satin white, and spray painted her! Flowers were leftover from my T-Shirt project, and hot glued on (Flower Tutorial in previous post). Took me about 10 minutes, including drying time. (Note: it only dried that fast because the high today is about 96 degrees and I put it out in the sun. Man, I love AZ!)

Cost was free because I had everything on hand. If I had to guess, a can of spray paint is about $5, bag of glue sticks are like $1, and a square of felt is like, 40 cents at Michael's. Flower petals made from an old t-shirt.

P.S. Don't you love my potpourri bowl? Found it in the bathroom decor section of Target for $10, and it came with a lager one as well. Home decor isn't always in that one special little section. You can find amazing things in the kitchen, bathroom, and garden departments!

GET CRAFTLICIOUS!

Tuesday, May 24, 2011

J.Crew/ DownEast Basics inspired flower tee...

Before we Get Craftlicious, I wanted to give you an update about Chloe: Unfortunately, on Friday my puppy girl was getting continually worse with her Parvo. We consulted with a Vet, and he informed us that in her state, with such a low immune system, her chances for survival were slim to none. We could tell she was in loads of pain. After a lot of prayer and consideration for my sweet little dog, we made the difficult decision to put her down. It would have been inhumane to make her suffer through the final days of Parvo, and I couldn't bear to see her go through that. We said goodbye to her on Friday night, but feel comforted in the fact that she is in a better place now.
I have been so sad the entire weekend, but today I woke up and decided that the only way I can get past it is to do something I love. I quickly skimmed my list of upcoming projects, and this one was the cheapest, and I had everything on hand! I hope you enjoy!

.....................................................................................................................................................................

If you're anything like me, you probably spend a portion of your week shopping online at places like J.Crew and Anthropologie. You'll also notice that they charge about $40 (give or take a few) for a plain cotton t-shirt with few embellishments.
Well my friends, I made one. I know, I know, Get Craftlicious is supposed to be about home decor. But seriously, I just want my Target tee's to look a little cuter so that I don't feel like poop. =) Only thing is, I'm a terrible sewer... I don't even own a sewing a machine. So what's a girl to do? I know! Make one Breann style, and hot glue it!!!

What you'll need :
A cotton t-shirt - that you'll want to wear
A cotton t-shirt - that you don't mind cutting up for your flowers
Felt - the same color as your flowers
Fabric scissors - or just scissors that are sharp enough to cut through a t-shirt
Hot glue gun

To start, cut a piece of felt into a circle

As you can see, mine was egg shaped and that flower was just okay... best results will come from making it as circular as possible.

Next, you're going to use your felt as a stencil and cut circles out of your t-shirt for the flowers. I found that it takes about 7 or 8 pieces to make the flower look right.


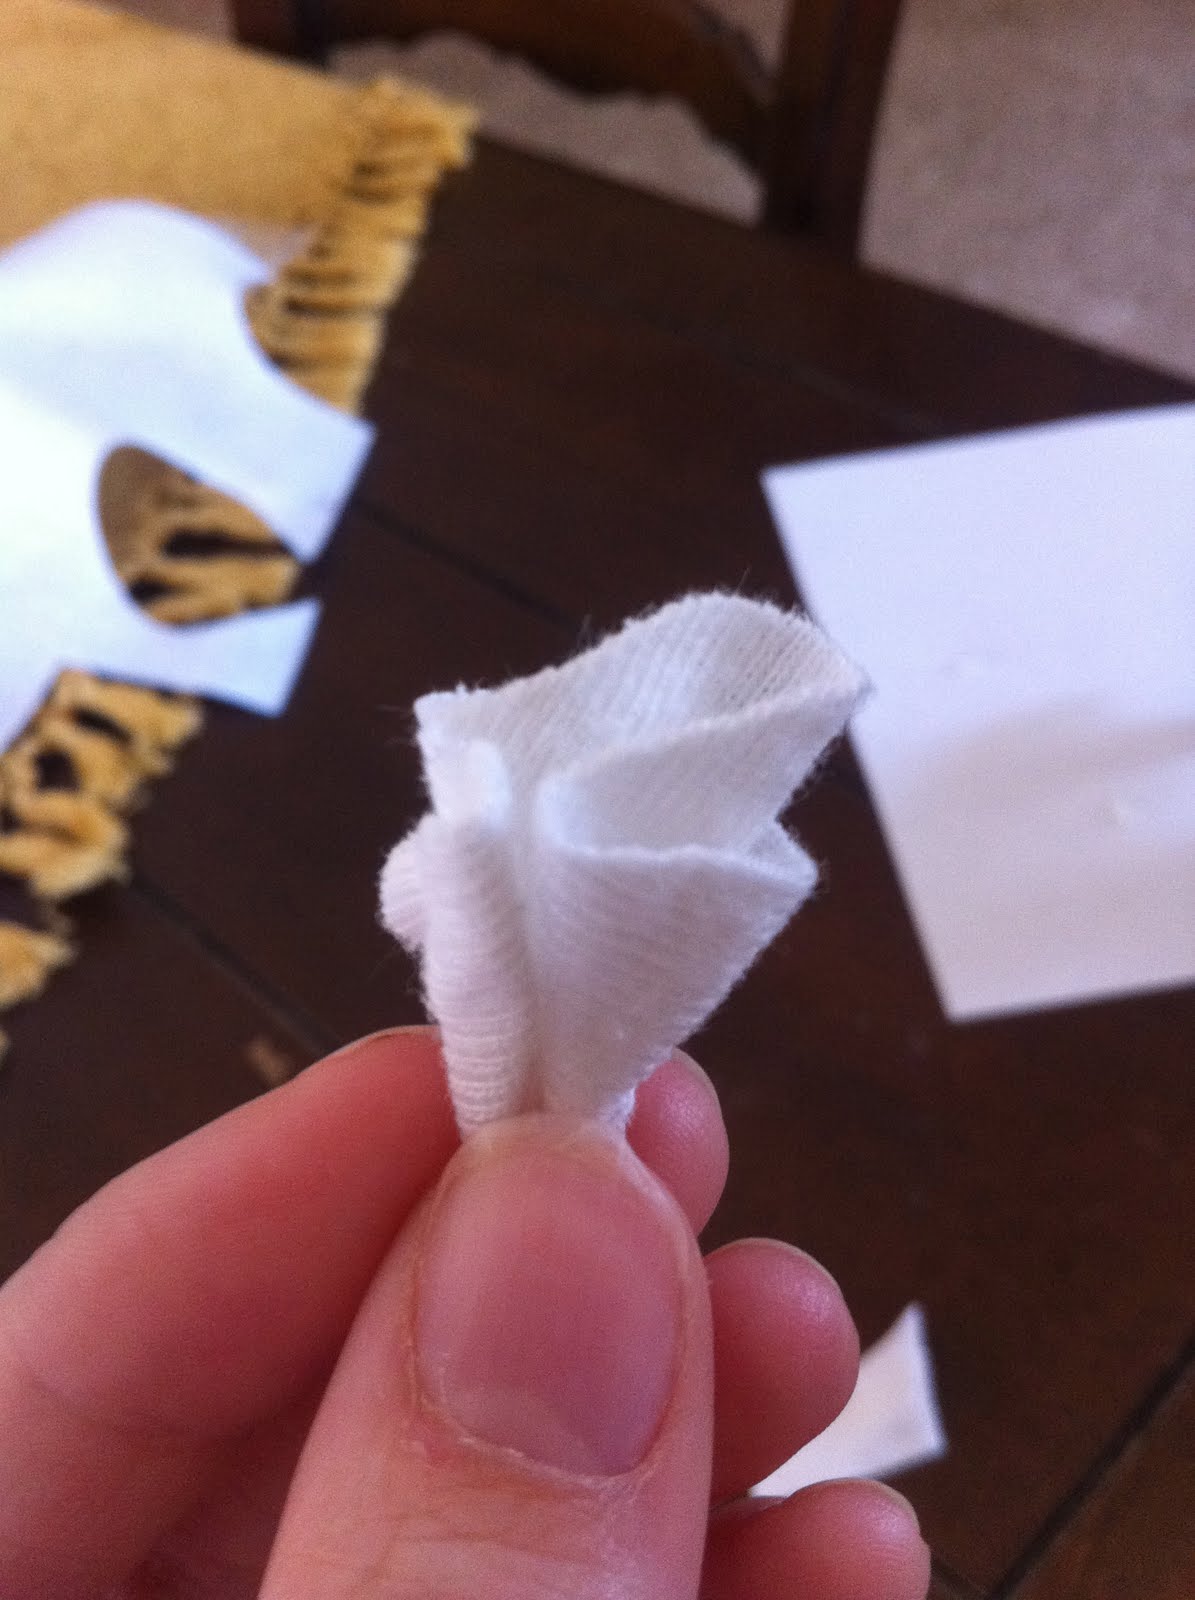
Now take your glue gun, and place a dollop right in the middle of one circle of fabric. To make into a petal, I found it was easiest to pinch the fabric underneath the hot glue. This will allow the edges to fold up and create your petal.


Next, you'll put some glue starting from the center of the felt circle to one of the edges. Then, put the petal on the glue laying on its side, like so:


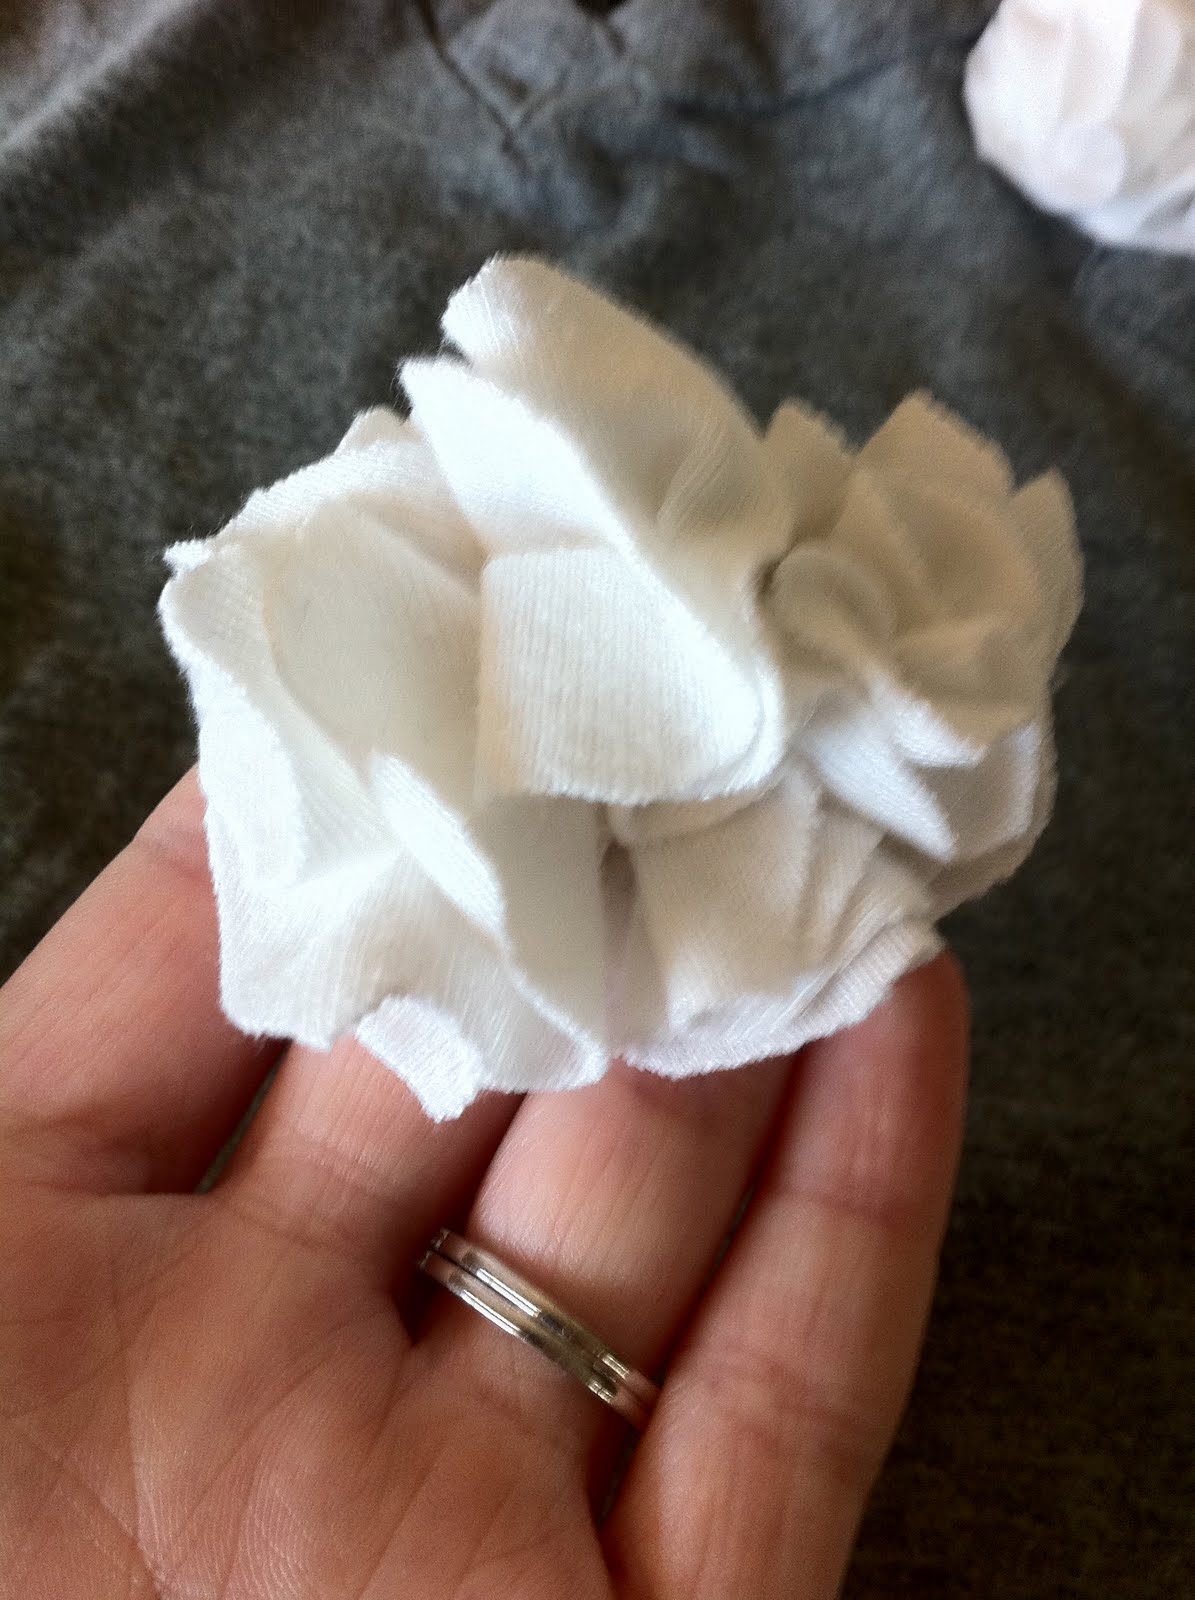
After you've finished gluing them around the bottom, put a big glob of hot glue in the center and place a couple more petals into it, with the bottom point straight into the glue. Aaanndd. you're flower is complete!


You can arrange them however you like onto your T-shirt, mine looks like this... dun duh duh DUN!!


SO CUTE, HUH?!!! I'm in love... it might just be my new favorite t-shirt. Oh, remember, how I told you about a dresser re-vamp? Here are some "before" shots of it taking up space in my brother's disgusting room:


You need to get excited, because I can't wait to Get Craftlicious on this sucker!

Hope everyone has a wonderful week, it's summer wahoo!!! Remember, I'm waiting for your ideas, so send them in ASAP and get featured!

Friday, May 20, 2011

Not so craftlicious...

Hello friends. I have bad news, I haven't been able to attack my craftlicious project this week. =( My mom has this sweet dresser that needs a re-vamp for a boys room, and I was SO looking forward to doing it yesterday!
Unfortunately, my sweet little dog Chloe has been super sick and lethargic lately. I took her to the vet and sadly, she has contracted the Parvovirus. For those of you who don't know what Parvo is, it's a virus that attacks the intestines (mostly in puppies 15 months or younger) and causes the dog to become severely dehydrated. They usually die very swiftly and painfully. The cost to treat her at the vet is in the thousands (which I wish I had, but don't) and she is deteriorating quickly. As of right now we're trying a home remedy which requires around the clock care, but it doesn't look like she's going to make it. We'll probably need to put her down soon. It's getting really hard to see her in so much pain, and it really feels like we're fighting a losing battle.

I know, it's super depressing. I promise once our situation with her is resolved there will be many a crafty projects to come. Keep your eyes peeled for the dresser re-vamp!

Tuesday, May 10, 2011

sCRAPping

Well, I'm basically a poop because I haven't done anything craftlicious in like, 2 weeks! So sad... my only excuse is my dog had 6 puppies and they are a HANDFUL! Between cleaning up their poo, setting up a dog run in the backyard, and trying to get them sold there hasn't been much time for crafting. Anyway, I finally had a day off and decided to scrap together some stuff and make a pennant sign. My mirror and table re-do needed some color and a new friend.

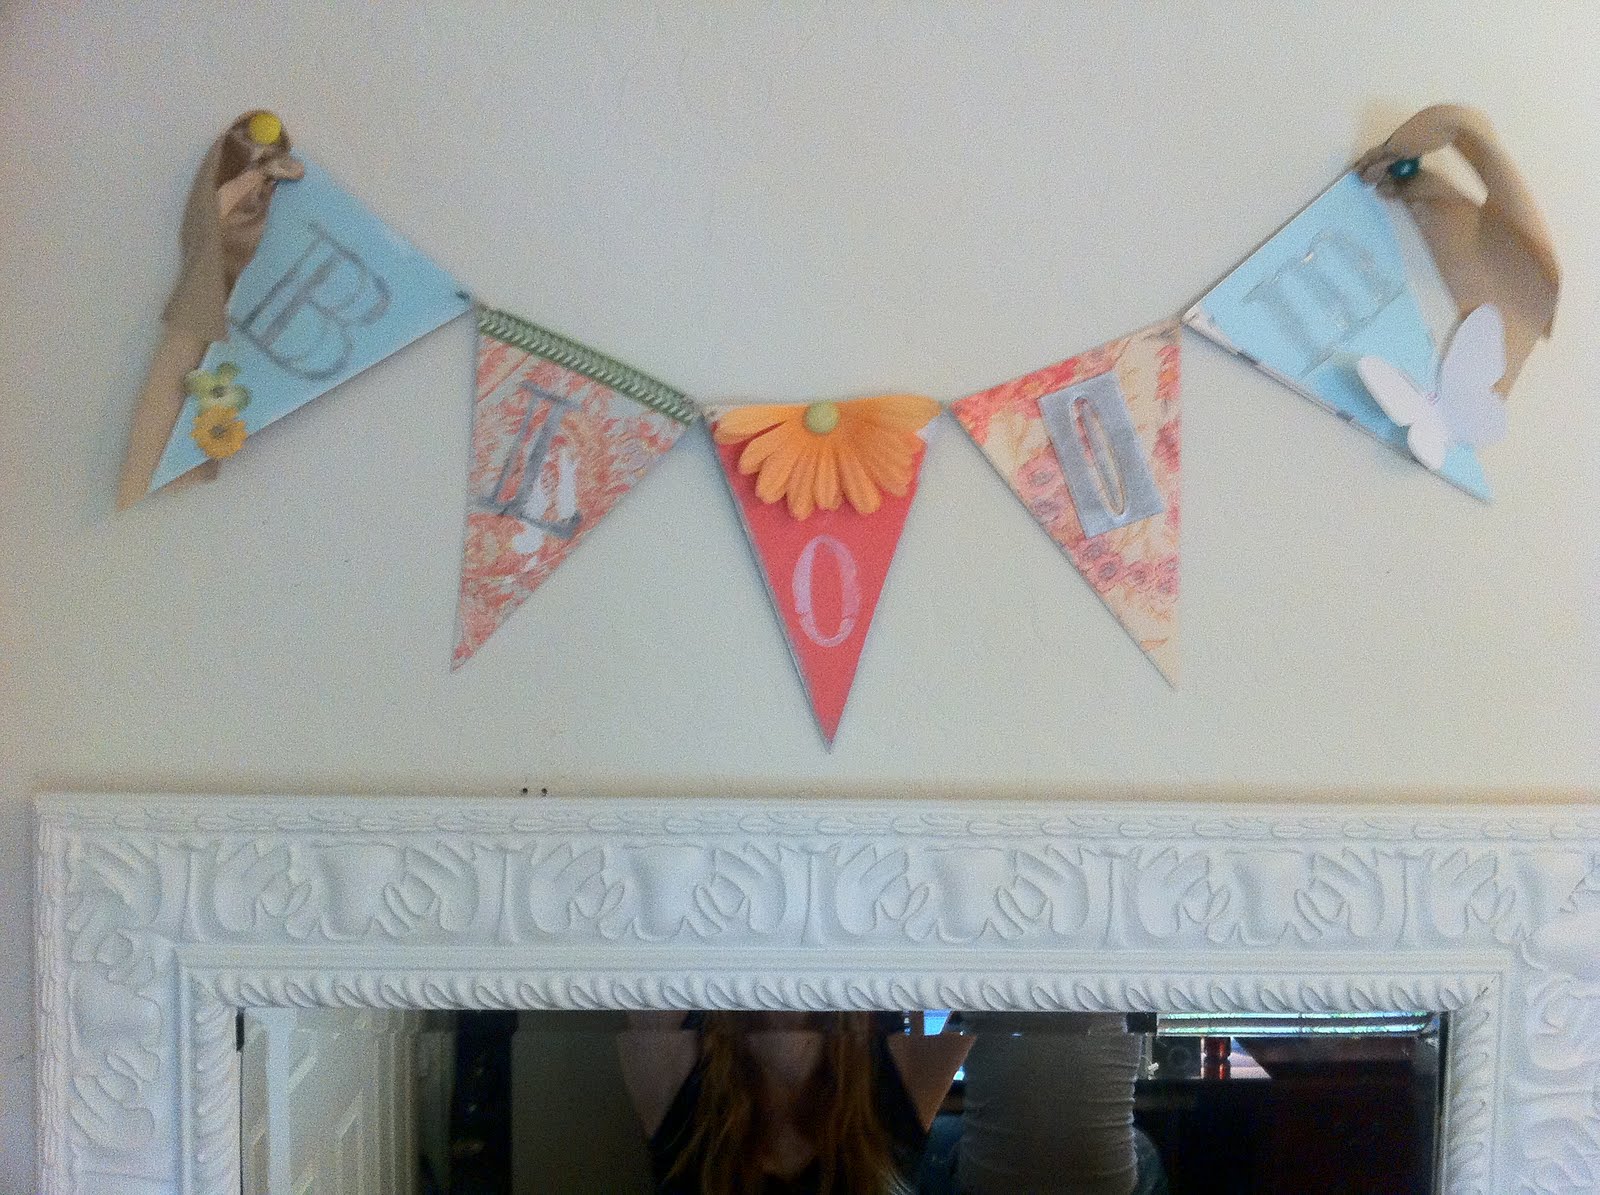
To start, I picked out some super cute scrapbook paper and cut it into triangles for each pennant. I decided I wanted my sign to say BLOOM, so I needed 5 pennants. I recommend gluing your cute paper to some heavy card stock so that it doesn't fly everywhere when you turn on a fan.


Keep in mind not to use too much patterned paper. You're going to add lots of fun knick-knacks, and if every piece is patterned it's going to look too busy.

Next, decide where you want each letter to go. 

I love using different fonts and ways of displaying letters... not everything has to match!

After all your letters are in place, you can add your fun little knick-knacks to really play it up. This is pretty much where the fun begins.

Most of my letters are from a stamp kit I stole from my mom. You can most likely find some at a scrapbook store, or print them from different fonts on your word processor.


Most scrapbook stores sell flower petals like this, or you could tear some apart from a silk flower.

This 3-D butterfly was super easy! I just found a silhouette on Google Images, traced it on some white card stock, cut it out, lightly folded it and glued it along the seam. So cute, huh?!


On a couple of them, i took my stamp pad and lightly brushed it along the edges... it gives it a really cool antique-y look!
To attach them at the edges, I used tiny safety pins... you can use ribbon or other items if you like, though.

Aaannnd, here she is!


Aaah, looks SO much better. Isn't it amazing what a little color can do?

Here is another one I've done before of my last name :


These signs are so fun and cute and they really brighten up spaces. It's nice to have a little extra something... kind of like a push-up bra, it just makes you feel better. ;)

I hope everyone had a wonderful Mother's Day, and there will more fun things to come! Maybe even a giveaway (hint, hint!)

Now get off your bum and go GET CRAFTLICIOUS!

Wednesday, April 27, 2011

Wall Collages!/ First Guest Ideas!

Alright, here come's the first Decorating Tips post! So here's a thinker, are your walls BORING? Is there only a clock or solitary frame above your couch? Do you have no idea where to begin with decorating the space above that super cute entryway table?
 Here's the dealio, I know a lot of people feel like they need to have a piece of something (i.e. picture frames, clocks, block letters, mirrors) on every single wall. Then when you take a step back and look at it, every single wall looks so lonely and boring with their one piece of decor. So here's what I want you to do:
MAKE A WALL COLLAGE! They are so super cute and it'll help you utilize your pieces TOGETHER! Don't be afraid to mix in letters and tiny shelves, it gives it so much more character!

Here are a few examples:

Exhibit A : Pottery Barn's front entryway table


Honestly, I own maybe 2 things from Pottery Barn, they're too expensive for my cheap taste. However, they have some of the BEST ideas! I absolutely LOVE the word sign and paddle on top. They set an awesome example of how to throw in artwork. I'm obsessed with their use of levels. Notice how every piece isn't lined up "just so" with the others? Keep in mind that not everything needs to be perfectly symmetrical. Ok, on to the next.

Exhibit B : My Momma's living room wall


Of course I have to show my Mom's stuff! Now, Mom hasn't used a bunch of levels here, BUT she's grouped the frames together really nicely. I love the block letter "B" thrown in there. I know the pic isn't great quality, but if you look closely, not all the frames are the same color... not everything has to match!

Here she uses a lot of symmetry, BUT different sized frames... LOVE!


Exhibit C : Meagan Bredsgaurd's wall above the couch


Now this girl knows whats up! Meagan has used levels, other items besides frames, and it's grouped together SOOO cute! I'm obsessed with the idea of empty frames! AWESOME!
Side note: check out that super cute coffee table... I know for a fact she got it for a smokin' deal on Craigslist. Way to be thrifty, my friend. Also, see the super cute pillows? Yep, she made them!

Love the little detalis... See in the right corner? A frame within a frame?!! Muy Bueno!

Meagan is a crafty little friend of mine, and will definitely be featured more on GET CRAFTLICIOUS... Check out more of her creations on her blog www.jmbredsguardfamily.blogspot.com


Not that bad, eh? Decorating can be SO simple if you just allow yourself to think outside the box! Remember to keep in mind not everything needs to match or be just frames... Now go and re-do that boring wall GET CRAFTLICIOUS style!

Sunday, April 24, 2011

Mirror and Table TRANSFORMATION

In my previous post I mentioned a couple little projects... the mirror makeover and the end table. Well, they're done, and they're amazing. Don't worry, I'm fa sho gonna give you my instructions.

P.S. for those of you who use special techniques and like things done "just so", you probably ought to look away now. I pretty much made everything up as I went along. I'm no pro... but it looks dang good.

Here are the before shots :

They were nasty/ boring. Here are the deets on the mirror:

I really haven't been in love with my decor lately, mostly because it's either black or beige. That mirror is one of the first things I bought for my house, and I love it... just not the color. I've been working on brightening up my colors and decided to paint it white. I considered antiquing it, but after it was painted it was perfect.

Step One : I simply covered the mirror with paper and masking tape, and primed.


As you can see, I already primed it... sort of. I found this really pretty white paint in my parents garage and decided to just slap it on and see if it could look antique-y. It basically looked like crap. I was feeling pretty distraught, and then it hit me to just leave it a solid white. Which brings me to Step Two.

Step Two: Spray painting

 There were a lot of spots where the paint brush couldn't get, so I hustled over to Home Depot, and grabbed me a can of Krylon. I really love this brand because it covers well, and dries super fast. (As pretty much everything does in the blazes of Arizona.)

Krylon Fusion in white

All spray painted! Grand Finale coming up!


Alright, on to the next. The table. I found her at the Antique Marketplace in Chandler, which is a dream and I could spend days in there if not for the smell of old people. Anyway, I decided I wanted her to be light gray with some fun antique-y accents. Whoever had it before must have been a freak. There was literally like 8 coats of paint on it, some glaze, and another coat of paint for good measure. Then, the took a bronze paint pen and colored in the fun edges and corners. So, I enlisted the help of my husband to sand... and sand he did!


It took about an hour to get to that point, and I was getting impatient. Then LIGHTBULB! I did a test spot and painted a corner gray. I sanded over that and got this result :


I was so excited with the way it looked! The gray just lightly dusted the white paint and I'm in love with the way it looks like it's peeling away from the wood. DREAM! So we spray painted the rest of it with Krylon Fusion in River Rock, and let it dry over night just to be safe.


Then we sanded off the rest and she was PERFECT! The second sanding process didn't take long at all. The gray paint came off very easily so I was able to be creative and pick the spots I wanted sanded off. Seriously, so cute.


And this is how both look in my bedroom! I think it looks AMAZING!
(Do you love how you can see me taking the pic in with my iPhone?! I can't find my digital camera or else the pics would be a million times better.)

Prices:

Mirror : Spray Paint - about $5, mirror - free since I already had it, but roughly $25 when I bought it
Total Cost : About $5 since I already had the mirror, otherwise around $30, depending on where you find your piece.

Table : Table - $39 at Antique Marketplace, Spray paint $5, knobs - about $6 on sale at Anthropologie
Total Cost : About $50

Table Decor : Coke-A-Cola bottle - about $2 (originally part of my lunch, Mexican Coke is the best FYI), White vase - $1 at thrift store, decorative bowl - $14 on sale at Anthropologie
Total Cost: $17

Not too shabby, eh? I'm obsessed. Start sending in your CRAFTLCICOUS ideas and get featured!